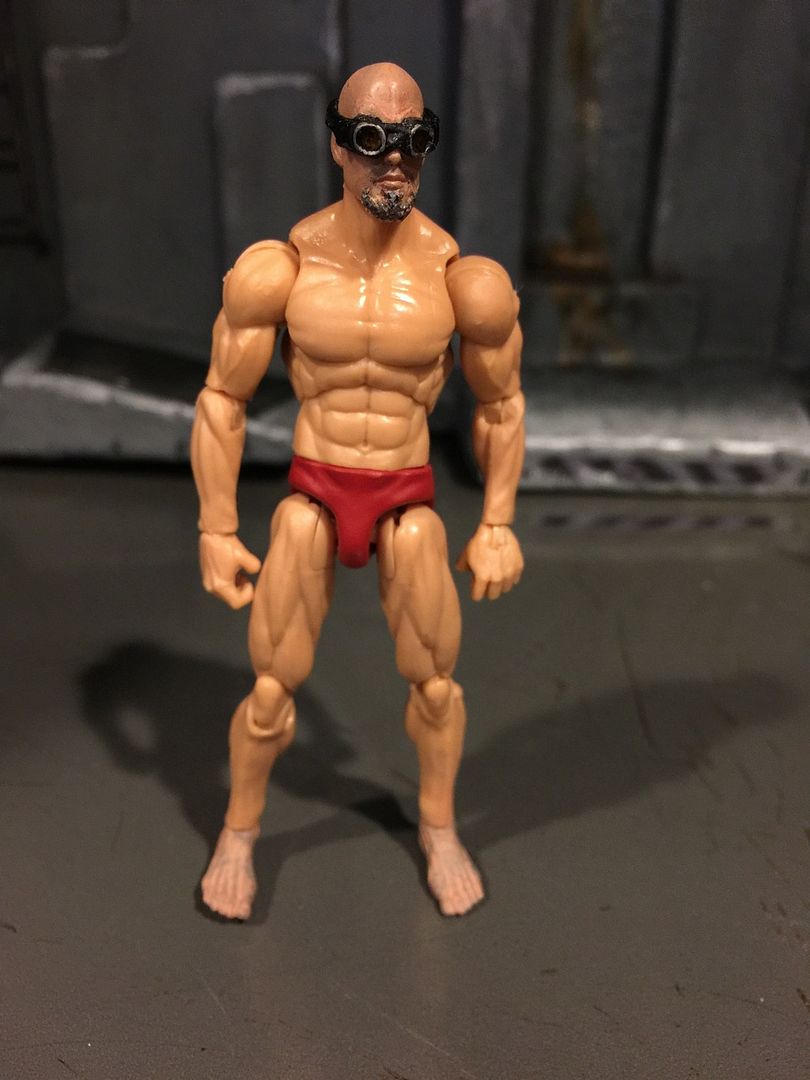
ok, don't hate, but I'm one of the lucky ones to have received my first shipment of HACKS figures. Me being me, I immediately started putting the figures to the test.
Please note, this isn't a traditional review. Perhaps it should go to General Customizing, but you're also looking at some WIPs, which is why I am here. It is more of a customizer's review, if anything.
If pressed to make one, the extent of my review of the figures, out of the package, is this: Wow.
Strictly from a customizing perspective, it is also Wow - though with some caveats.
As advertized, the HACKS figures (I'm working specifically with the male figures presently) are remarkably easy to disassemble and swap parts within the line. That will appease the customizing interests of many, but I'm more of a hands on modifications customizer, and I look for more than just color swaps. That is actually the first caveat. I see a TON of potential even in just the ease of part swapping. But someone like me isn't going to see the full benefit of that until another one or two themes hit the market, hopefully providing some clothed figure sculpts. As the library of parts grows, so will my contentment with the built-in HACKS style swaps.
In the meantime, here is what I've figure so far.
Head swaps: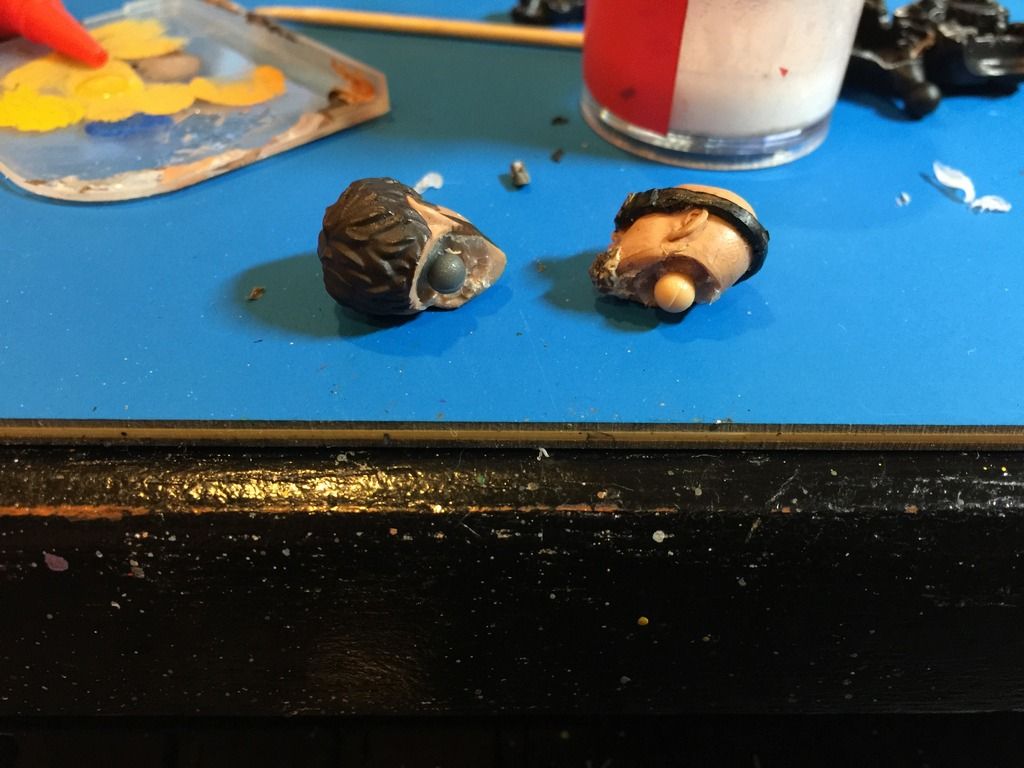
you probably know by now that HACKS has gone with a double ended peg insert in lieu of a joe-style neck ball. It marks a change for me in the normal type of head swap of simply dremel the socket and make a new one with hot glue. But this WILL BE a change for the better. The range of motion of this design is amazing. It might take one extra step to make a custom head fit, but it's well worth it.
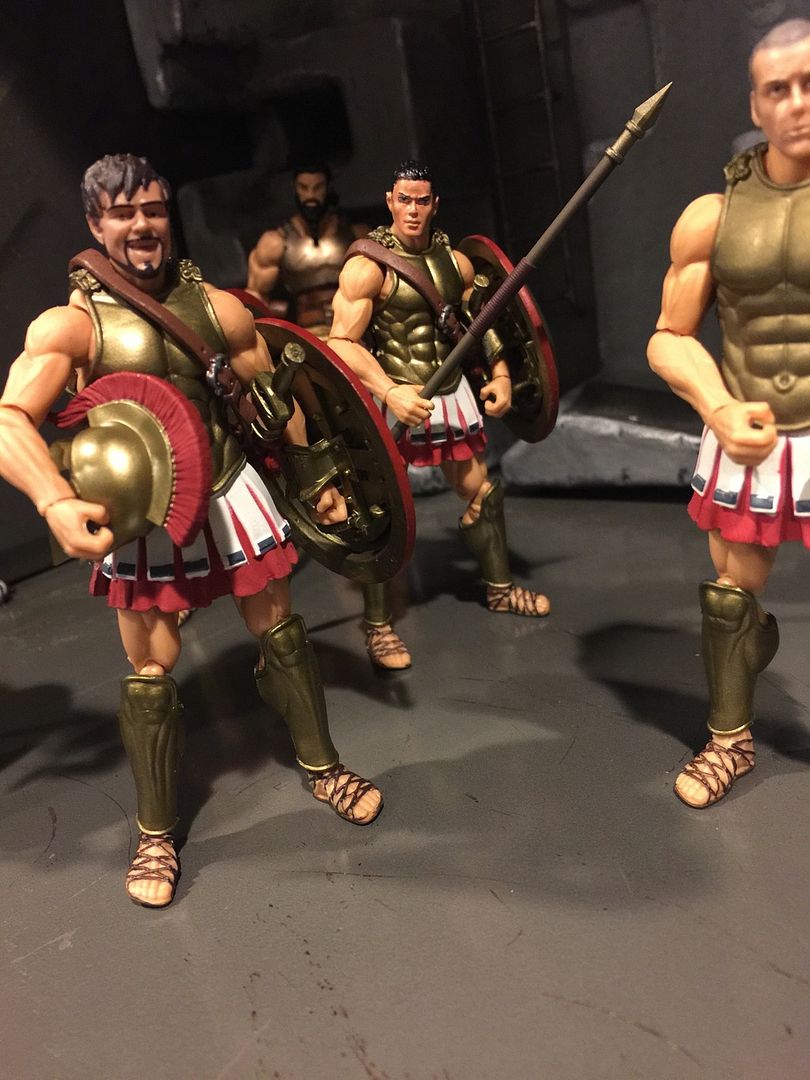
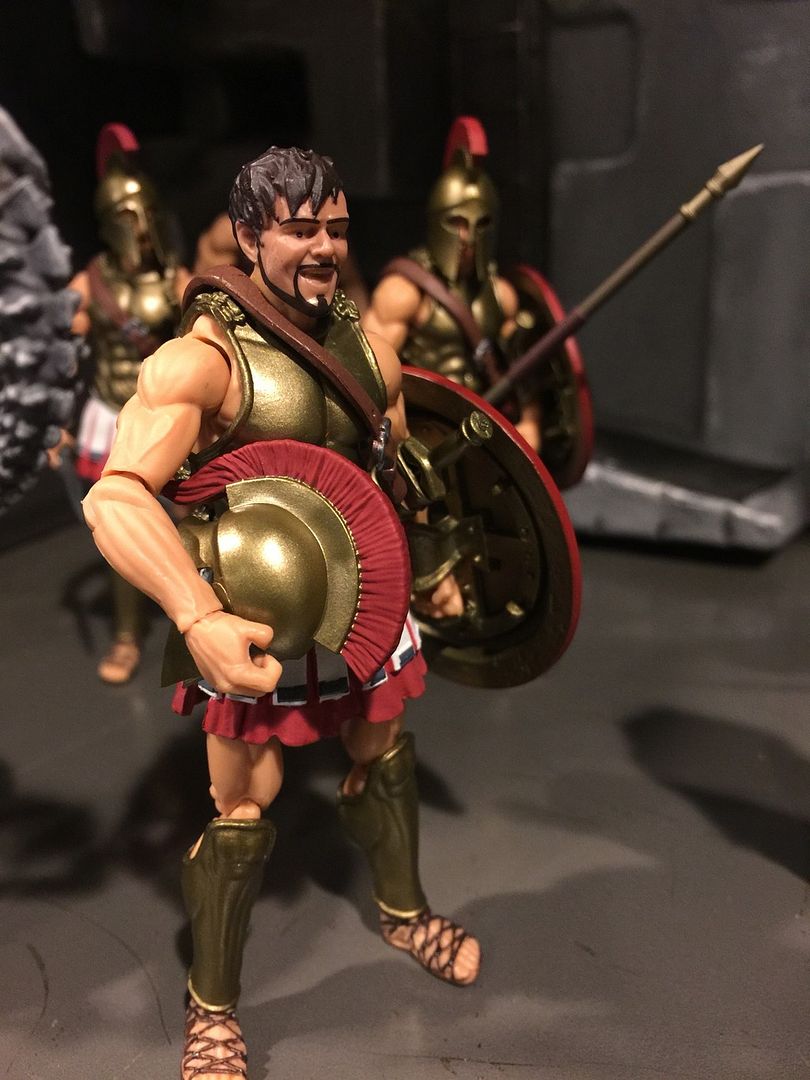
In the pic above, you can see I was already working on these within the first day of receiving the figures. The pegs come inserted into the heads, rather than the neck. So I have mimicked this for my customs as well. Luckily I had bought an army builder pack of Spartans (with the intent of giving each a different head), so I've got a lot of fodder for testing this out.
First I heated up the heads (boil and pop I guess) and removed the peg from the donors. Second, I popped the small ball end back into the neck. THAT IS THE ONLY NEW STEP TO A TRADITIONAL HEAD SWAP. From there, I dremeled out a deeper socket in the new head I wished to use, then test fit it on the neck. I used vaseline as a release agent on the head end of the peg. Then, same as ever, filled the new head with hot glue, placed into the position I wanted on the peg (which, remember, was already in the neck). Once the glue cooled, the peg stayed in the head, just like on the original. It can now be swapped onto any of these bodies.
If future figures beyond the Greek waves hold true to this uniform neck system, I now have custom heads that will fit every new figure BFS sends us. And it's as easy as ever.
Leg Swaps:So a lot of these figures are going to be used by me within either a mythological or fantasy type of realm. Maybe not directly as intended, but close enough. For those figures, the glaring lack of pants throughout the line will be no problem. Same is true I guess for any spandex based heroes.
But for a lot of what I am doing presently, I wanted to know if I could swap Joe legs onto these guys. One thing I've not yet done, but I'm sure others will, is try a direct MTF swap. To be honest, I'm not enamored with the MTF legs, so I'll leave that to others. But I did start in on Joes right away.
My first observation was that the hardware on the HACKS is plastic and not metal. I have a small concern as to what that will mean over the life of the figure. It is a very hard plastic, so I don't necessarily expect breakage (though heavy use of the hard Joe plastic legs may put it to the test). My bigger concern is that I know many of my Joes over the years have become loose in the hips. The hard plastic-metal combo allows for a drop of superglue at the joint to add friction and keep the joints secure without locking them up. I'm hoping I never have to come up with a way to do that with the HACKS - Joe leg combo.
The good news about my second observation - it was that the ball on the t-bar section of the hardware seemed to be the exact same size as that on a modern joe metal bar. After taking apart the HACKS donor (so far it seems like I need to break it down all the way to get the leg apart safely, but I'm willing to be corrected), I was happy to see the Joe legs I tried popped right on.

Small caveat - the initial fitting resulted in a feet spread stance. While the fit was without mods, I wanted the ability to have the feet stand together, so I did trim a small part of the waist piece to allow this to happen. I don't know if the fit will be universal. I've really only tried this one piece so far, but I am pleased.
You can see the subject here is an update to Ajax. I've traditionally used a Snake Eyes torso to give the impression of molded body armor. I thought a bit about modding a Spartan's armor for a removable version of this, but I generally prefer the way I am doing it now. The main reason for doing the change for me is better proportions. The SE torso had become undersized and weirdly proportioned compared to later parts. the HACKS torso corrects that AND allows for all sorts of future head swaps to keep me interested in extending my long line of vanity customs

Ultimately, I'll need the black blank to be able to do this as seemlessly as I want. But this made for a great trial run. I'm sure I'll put even these part to use as an alt outfit when all is said and done.
Arm swaps:This is currently my largest concern. Like I said above, once the catalog of parts starts to include clothed arms, the HACKS swappable joint system's brilliance will be on full display. For now, however, at least for those who want to do more than take an Odyssey, this will cause some problems. The issue is that the easy swap shoulder peg which helps define the HACKS system also renders the entire library of 1:18 scale arms already in existence useless, without making some risky mods.
Listen, any customizers that are already in the business of swapping out the shoulder joints may not even care about this. I'll admit, it's not my strongest skill, but I may have to get better at it. Because the alternative I tested this weekend was far from perfect, and already resulted in one damaged Joe shoulder not useful even with the HACKS, and every modified shoulder - even those that work on the HACKS are now forever barred from returning to Joe-dom.
Because if you modify the peg itself, rather than swap it, the first thing you have to do is chop off the disk.
Never one to get squeamish I did this right off. Problem is, the peg for a lot of the Joe figs are even then still thicker than the HACKS peg. My first inclination was to thin down the peg with the x-acto. This, sadly, led to my first casualty. A peg thinned so far it wouldn't hold. The other arm of the pair I cut the disk, then forced the peg into the hacks socket without thinning. It took some force, but it went in, and - good news - held. Mostly. But that can't be good for the plastic. Next time I do this, I will heat the torso first so that it will cause less stress (hopefully). I'll keep you posted, and will also add some pics tonight of what I am talking about.
The bigger problem with this technique however is that the newly modified peg might just be enough bigger than the HACKS peg that you can never go back to the HACKS shoulders after making the swap.
Even as I write this, I am convincing myself that I am going to have to get comfortable swapping the joints entirely. And with that will hope someone reading this gets the idea of selling customizer hardware packs, with the neck pegs and joints, and internal hardware, even if not actual limbs and torsos...
Painting:Second caveat to the "wow" comes here but I'm going to blame user error and give it a pass. Part of what makes these figure so great are the the tight fits and seemless transitions of body parts. That, however, implies friction. And friction is not paint's friend.
Luckily the blanks will end up being available in so many colors it will be a moot point. But I tried some painting nonetheless.
First thing I tried was tamiya fine gray primer. I was surprised at how well it adhered. And because it was such a thin application, I am pleased to report it stood up well to the friction of the chest joint.
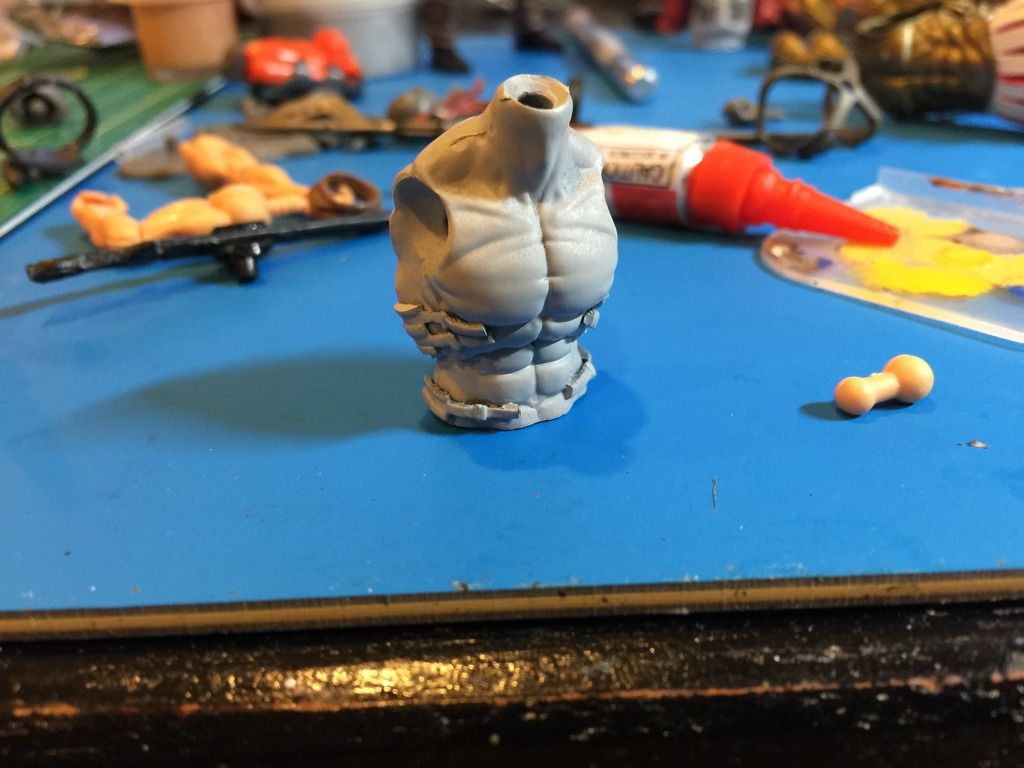
(straps of course added by me)
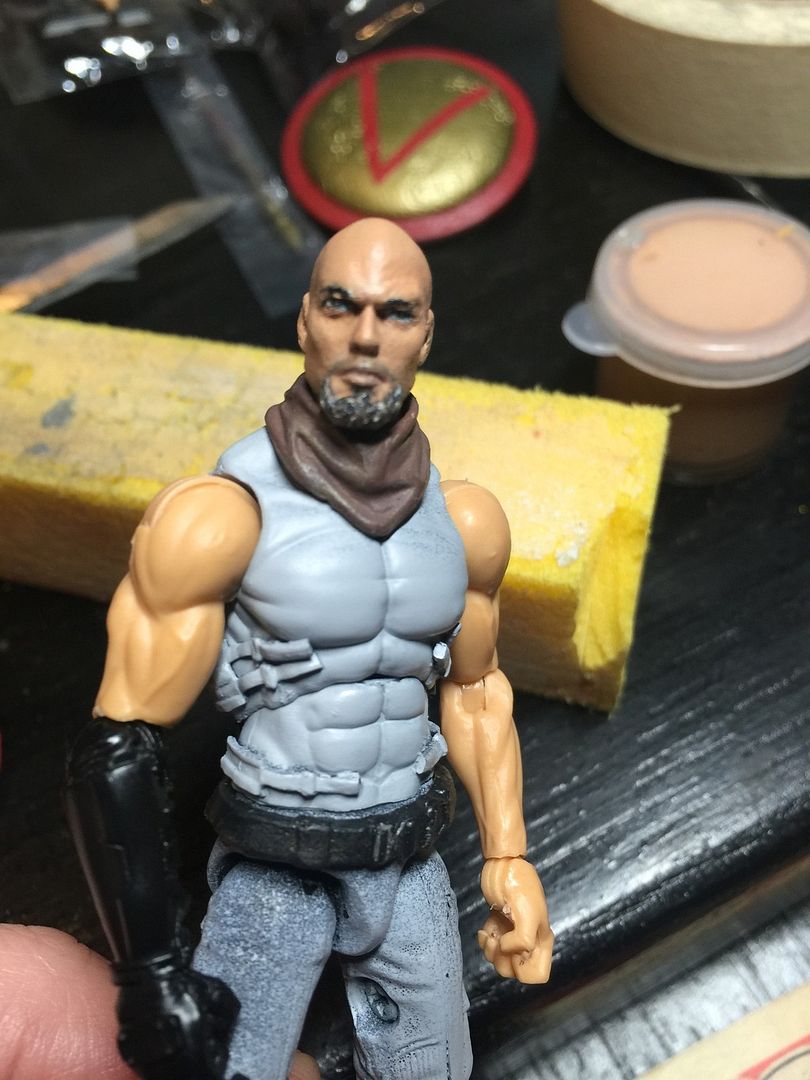
Then user error set in. I may try to remove the paint and start over at this stage. Because a wash is what I really wanted next, but I went with a coat of brushed on paint instead. Bad news, perhaps resulting from my impatience, but the brushed on paint scraped pretty heavily even with primer underneath. I suspect that patience and prep and thin coats will address this. But don't ignore that there is friction, at the chest joint especially, which is greater than on most joes and marvel figures.
I will update with info after my next round if I can remove any of the failed effort. That said, being impatient and eager to see a proof of concept of my new Ajax step forward, my first fix involved trudging stupidly on and spraying the next coat of paint. And it did ok. Better by far than the brushed paint, with some rubs, but much fewer. Interestingly even the rub areas reduced the paint down only to the primer level, which has held throughout.
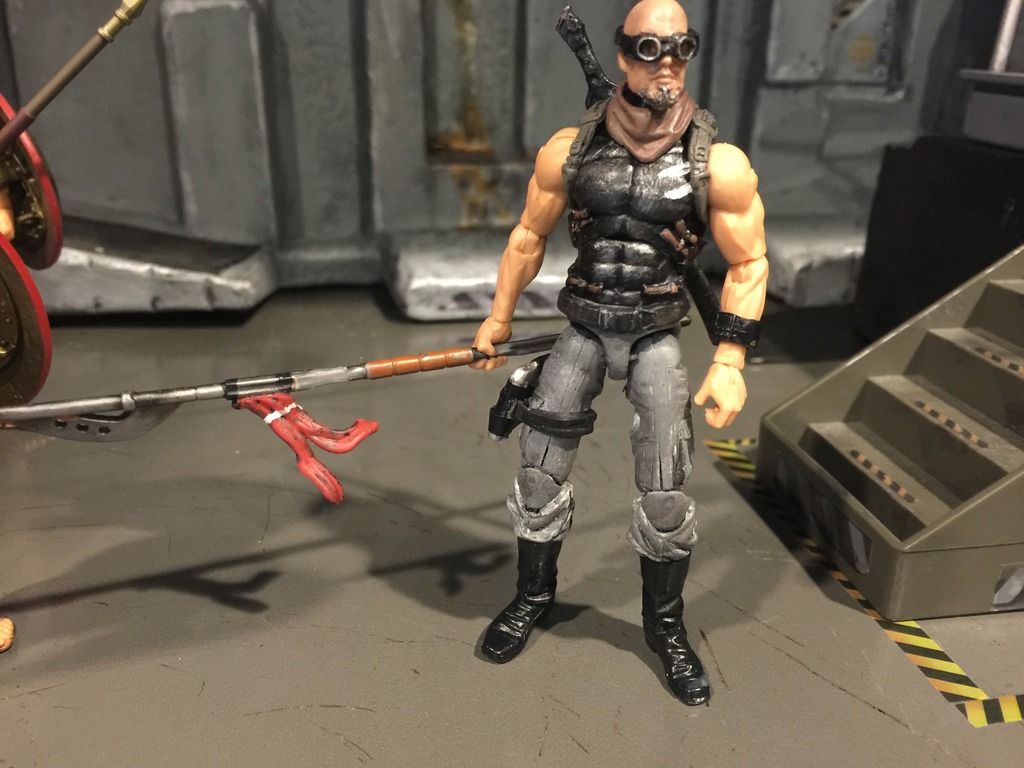
I'll post more updates here, as I keep working. Especially with regard to the arms. In the meantime, here are some head-swapped spartans,
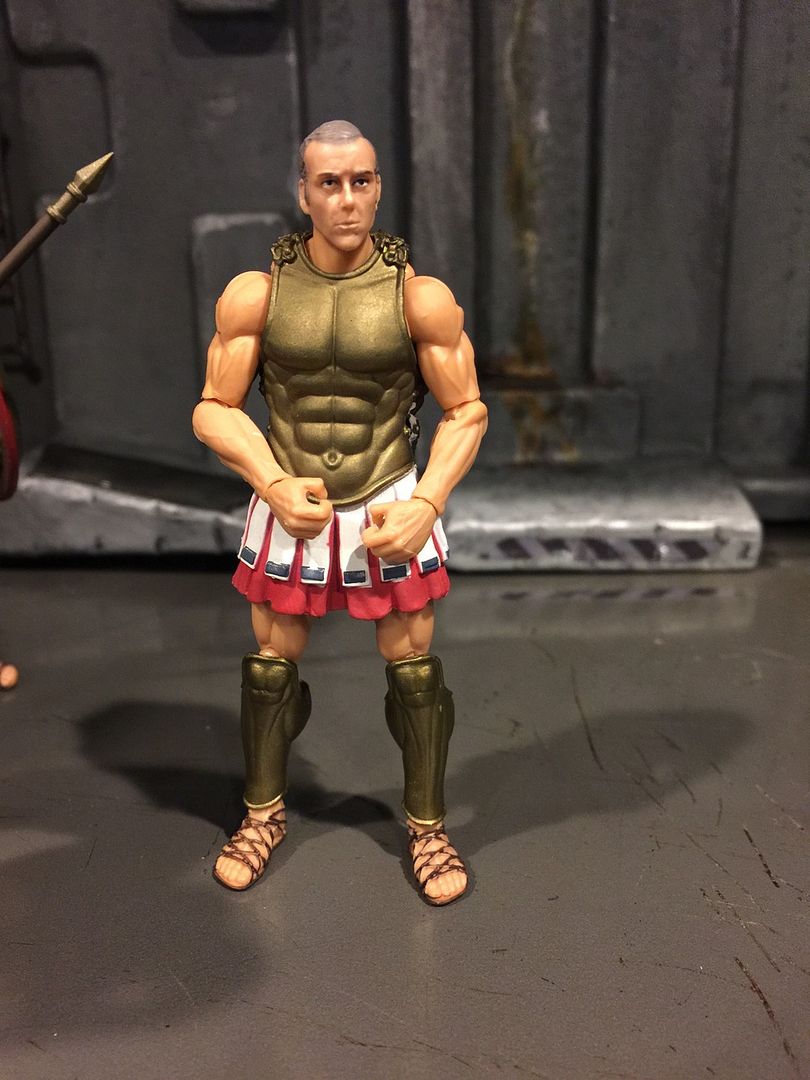
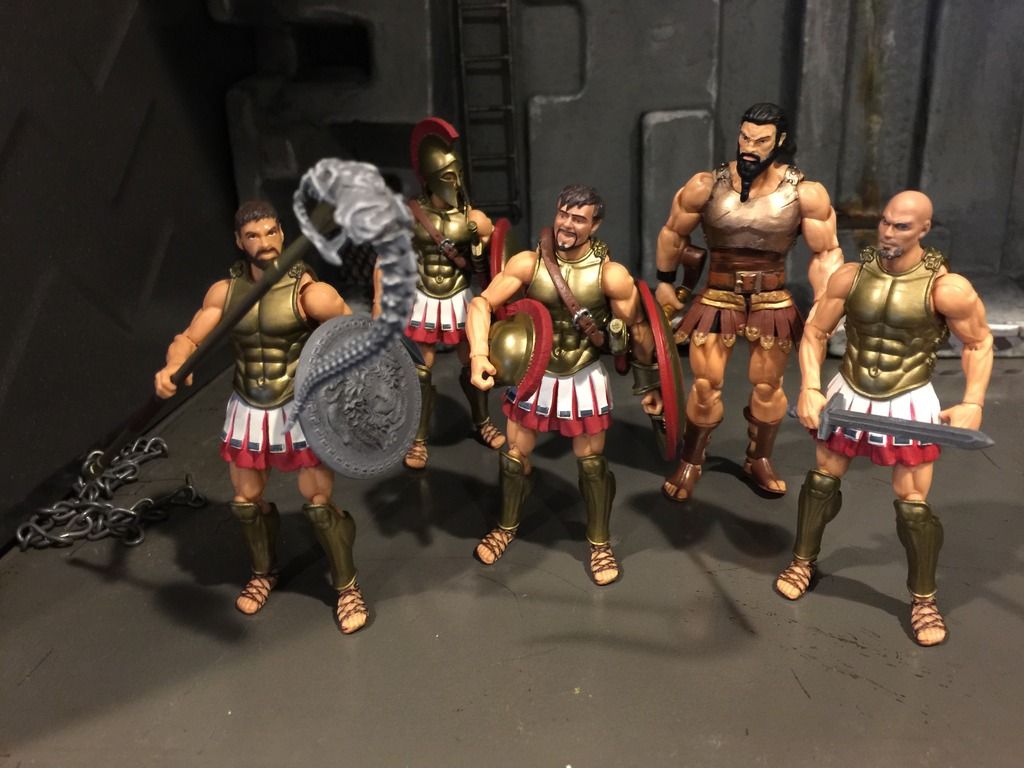
Pantsless Bindy 2.0
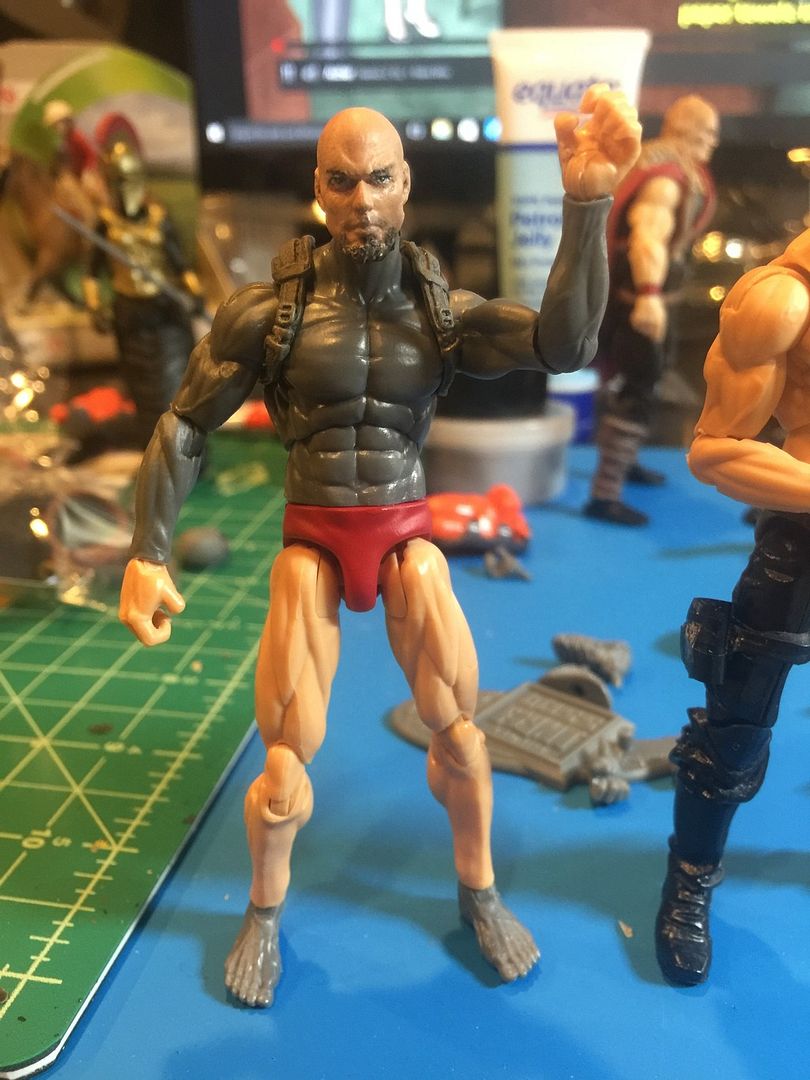
And an example of why you don't want Knighthawk as your neighbor... "Dude, can I use your hot tub?"
