Okay, here's the electricity/energy tutorial. Really, it's just about the same as the flame tutorial, so I won't go into as much depth on this one except on the new things. I have added how to make a 'projected' flame/energy effect.
---------------------------------------------------
STEP 1: Prep and Foil
----------------------------------------------------
Just like with the flames, you want to evaluate what parts of your original piece you want the effects to wrap onto, and then foil them off.
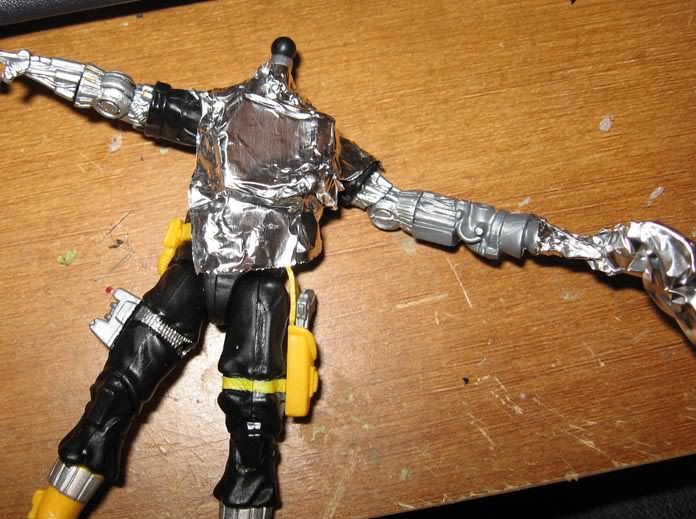
If you want an effect that projects out from your piece (like sith lightning), then just wrap the original piece in foil, starting with the part that you want the effect to project out of (hand, gun barrel, etc). Then make a large blob of foil that extends outward into the direction you want the projection to go. Make it pretty thick, as it needs to be able to hold its shape and the weight of the hotglue. Like so:

(of course, in this example, I could have made it a lot easier by removing the bat's weapon attachment, but since not all figures have removable hands, I left it on).
----------------------------------------------------------------
STEP 2: Hot glue
----------------------------------------------------------------
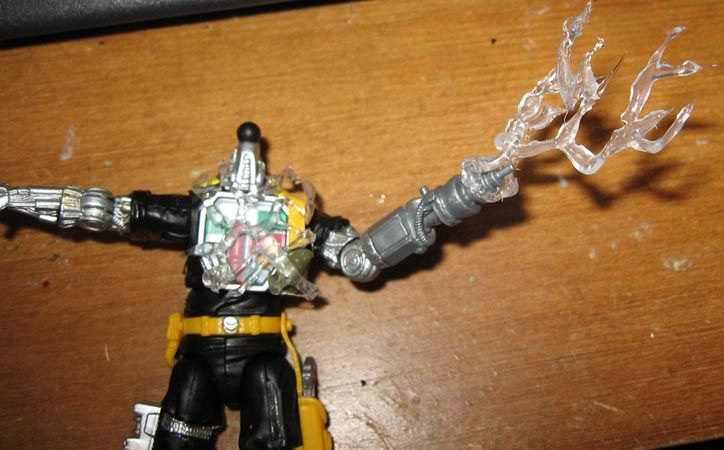
Electricity is a lot easier than flames in this regard. Just lay down tracks of hot glue in a electricity-like pattern (looking at SW lightning effects helps) and try to keep the glue laying flat. You can vary the width of the glue tracks for a more realistic look. Like with the flames, make sure to make the glue frame wrap around your piece, not just sit on top, so the finished product with hold on by itself.
For the energy projection, start with a spiral that with coil around the original piece (in this case, the end of the BAT's weapon attachment). After that, just start branching off of that coil, adding glue tracks to the blob of foil that extends outward. Remember to make use of all sides of the foil blob. You're going to want to make sure that all of the glue tracks are pretty thick here, since they have to be able to hold their own weight. Make especially sure that the glue that makes up the coil is nice and thick, since it has to hold the entire effect.

-----------------------------------------------------------------------
STEP 3: Removing effects
-------------------------------------------------------------------------
Remember to let the glue fully solidify and begin popping the foil off. With the projected effect, it may take a bit more effort. Don't be afraid to bend and flex it to loosen the foil; you can always fix any tears or weak spots with dabs of hotglue afterward. Remove any stringing, and fit the effects onto the original piece to make sure they still fit. If they need any repairs made to help them fit better, do that now.

---------------------------------------------------------------------------
STEP 4: Painting
---------------------------------------------------------------------------
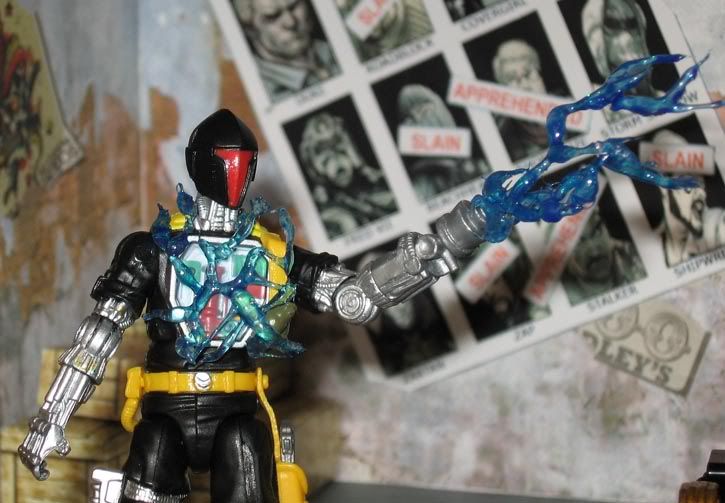
I used Tamiya transparent blue for this. Just slop it on, and make sure you get every surface. If you don't, it'll show up more than it does in the flame example. Once you're finished painting, you're done!

Thanks for all the feedback! I'm glad I can contribute something to the community. Feel free to ask any questions!


